Full How-to Build Video:
Part 1: Dog Food Bowls
Part 2: Dog Water Bowl Stand
Project Details:
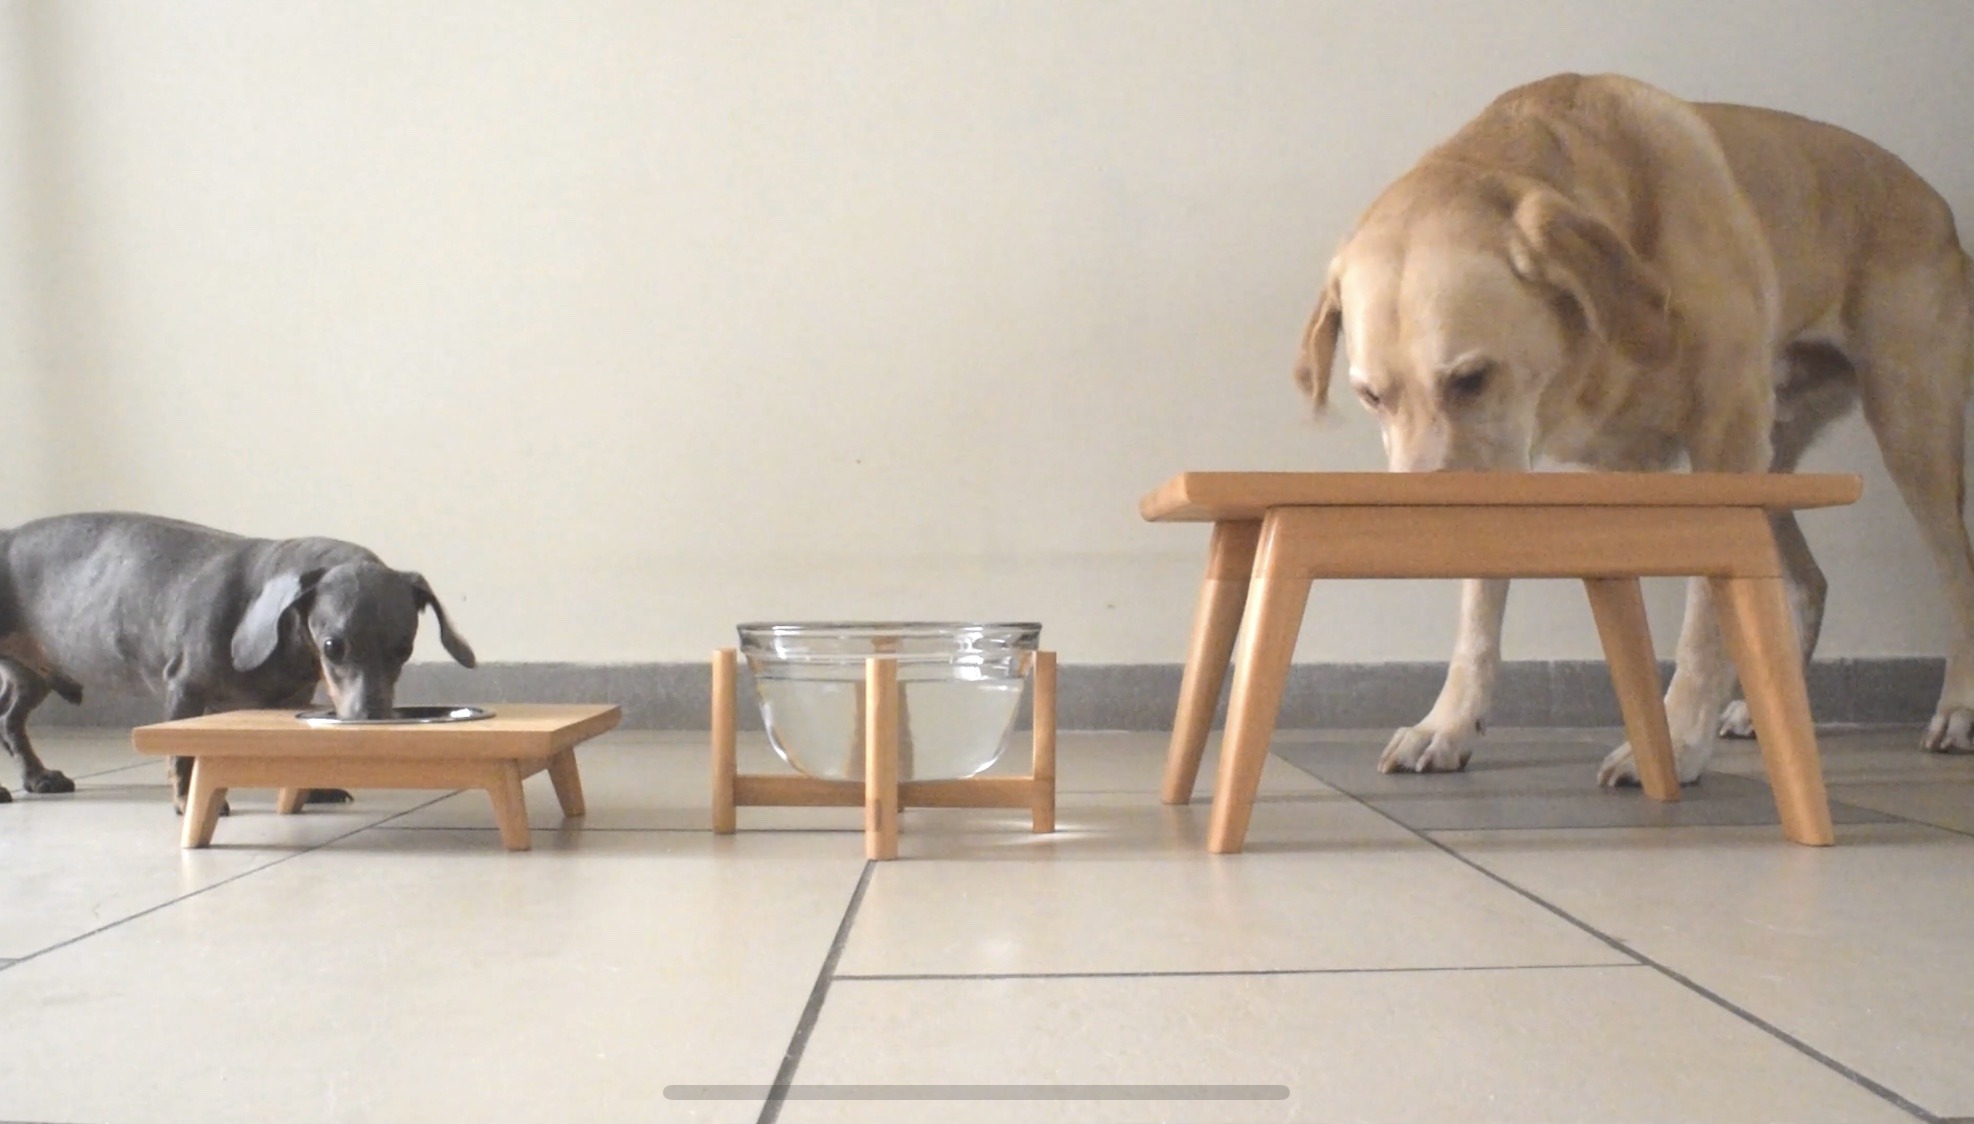
Dog Food Bowls:
I put together these mid century dog food bowls to not only help feed my obsession with mid century inspired design and make my pups feel fancy, but also to practice one of the sturdiest of joints – the bridle joint.
To start this project off, I squared up the raw lumber I had dried using a planer, jointer, and rip saw.
Then, I dimensioned the planks to 4″ and glued three longer (~20″) planks together into a panel, and two shorter (~10″) planks together to create the two table top for the dog food bowls. I made the individual planks longer than the desired end dimensions to help take some pressure off the glue ups, as I could just trim the edges down to the squared final dimensions once dry. I do this a lot when working with raw lumber – especially here in the Congo. With the dips in humidity from dry to wet season here, it can make for a rougher drying process on the lumber. This in turn makes getting the planks square a little more arduous, and with the ever present calculation of “do I run it through one more time or do I try and save some depth” leaving myself the option of trimming down rough-left edges, instead of trying to make everything perfect before glue ups just makes sense.
…Any way, while the panels dried, I got to work on the legs. After going through the same squaring process, I cut each set of legs down to an equal length. Not the final dimension, but all the same so when I ran them through the rip saw with a simple taper jig, I would end up with and equal taper for each. Once the taper was placed, I cut the legs down to their final dimensions at a 10 degree angle using the compound miter saw.
Then, using a DIY tenoning jig, I ran the top end grain of the legs over the rip saw at the inner most depth for the tenon of the bridle joint. I did this for both sides of the leg. Then, using a combination of a carefully run compound miter saw and a hand saw to finish it off, I cut the bottom of the tenon excess away.
To cut the mortise in the stretchers, I added a 17 degree guide to the tenoning jig (so the back of the tapered leg would sit flush against the stretcher) and used the rip saw to hallow out the mortise. I’d recommend sneaking up on your outer most edge of the mortise, as it is so easy to mis-measure or miscalculate and end up with a very loose joint.
With both element of the legs done, I glued them together. I used angled blocks to give the clamps a better hold – angled at 10 degrees to match the angle of the outer leg.
While those dried, I flipped back to the table tops, cutting them down to dimension on the rip saw using a cross cut sled, and also cutting out the cross stretchers at a 90 degree angle, to later connect the leg pairs together.
When all the leg components were ready, I used simple dowel joints to secure them together; and once those were cured, I used splined, floating, through tenons to secure the base to the table top. Because the table tops are so small, I’m hoping to get away with this move when it comes time for wood to expand or contract later one dow the road – but I wouldn’t recommend this for any larger table top, as it might cause a warp or split.
With the components all done, I used a router with a gouge bit and a circle cutting jig to remove a circle in the center of the table top to make room for the hammer steel dog food bowls.
Once it was structurally complete – all that was left to do were final finishes. Because of what I’ve been able to find on the local market here in Congo, these finishes are nothing fancy and not what I would ultimately recommend so I won’t dive into them too deeply, but I will say a wood conditioner and something that will help mitigate any water damage are your best bets here!
And that’s a wrap!
Dog Water Bowl Stand:
The dog water bowl stand was much more simple. Using lap and half lap joints, I created all the connection points. The lower stretchers were cut at 9 inches to equal the total circumference of the bowl plus the width of the two upright legs, with a lap joint placed directly in the middle. The lap was cut to half the depth of the stretchers. Then, I cut half laps in either end of the stretchers, perpendicular to the center lap, and on opposing sided at either end.
To make the legs, I simply stacked the the legs on the cross cutting sled for the table saw, and cut another lap joint about a half inch above the bottom of each. This lap ended up being a little bit more shallow than half the depth of the stretcher piece that would connect here, but I ended up liking the asymmetry of it!
With all the lap joints and half laps in place, I simply glued the pieces together and then rounded over the exterior edges of the legs with a rounder over bit in the router, did a final sand down (working up through the grades gradually), and finally adding finish!
Want full plans?
Work worth doing.